Building an AI app with a knowledge base


Hello marblers.
This guide explains how to use Marblism to launch your project.
We are developing Marble Bot, an AI-powered issue tracker that uses Retrieval-Augmented Generation (RAG) to generate responses.
What is RAG?
 Extremely short RAG explanation
We will use this mechanism to ensure the AI understands Marblism documentation and provides accurate responses.
Project Creation
Information
We start by outlining the project’s essential features and select the AI App type to include the AI RAG module in our project.
Modules are pre-developed portions of code, ready to use. Asking the AI to build this AI RAG module from scratch would be too challenging.
**Should I include technical details?
**No. Don’t ask about the stack or specific libraries. This description’s only purpose is to help the AI define your product pages and user stories.
 Project creation - Information
Pages & User Stories
Next, the AI automatically generates the pages and user stories. It’s important to review this information carefully to ensure nothing is missing from the overall user experience.
 Project creation - Pages & User Stories
Here is the final version I edited and submitted.
Home Page
- As a user, I can see a list of all issues. When I click on an issue I'm redirected to the issue detail page.
Issue Creation Page
- As a user, I can create an issue with a title and an initial message.
- On creation, I'm redirected to the issue detail page
Issue Management Page
- As an admin, I can close issues so that resolved questions are marked appropriately.
- As an admin, I can delete issues so that irrelevant or duplicate questions are removed.
- As a user, I can post message to the issue like on Github
- As a user, I can click a button to get an answer from an AI Agent. The AI Agent uses RAG to know about the context and provide an accurate answer.
- As a user, I can edit or delete my messages
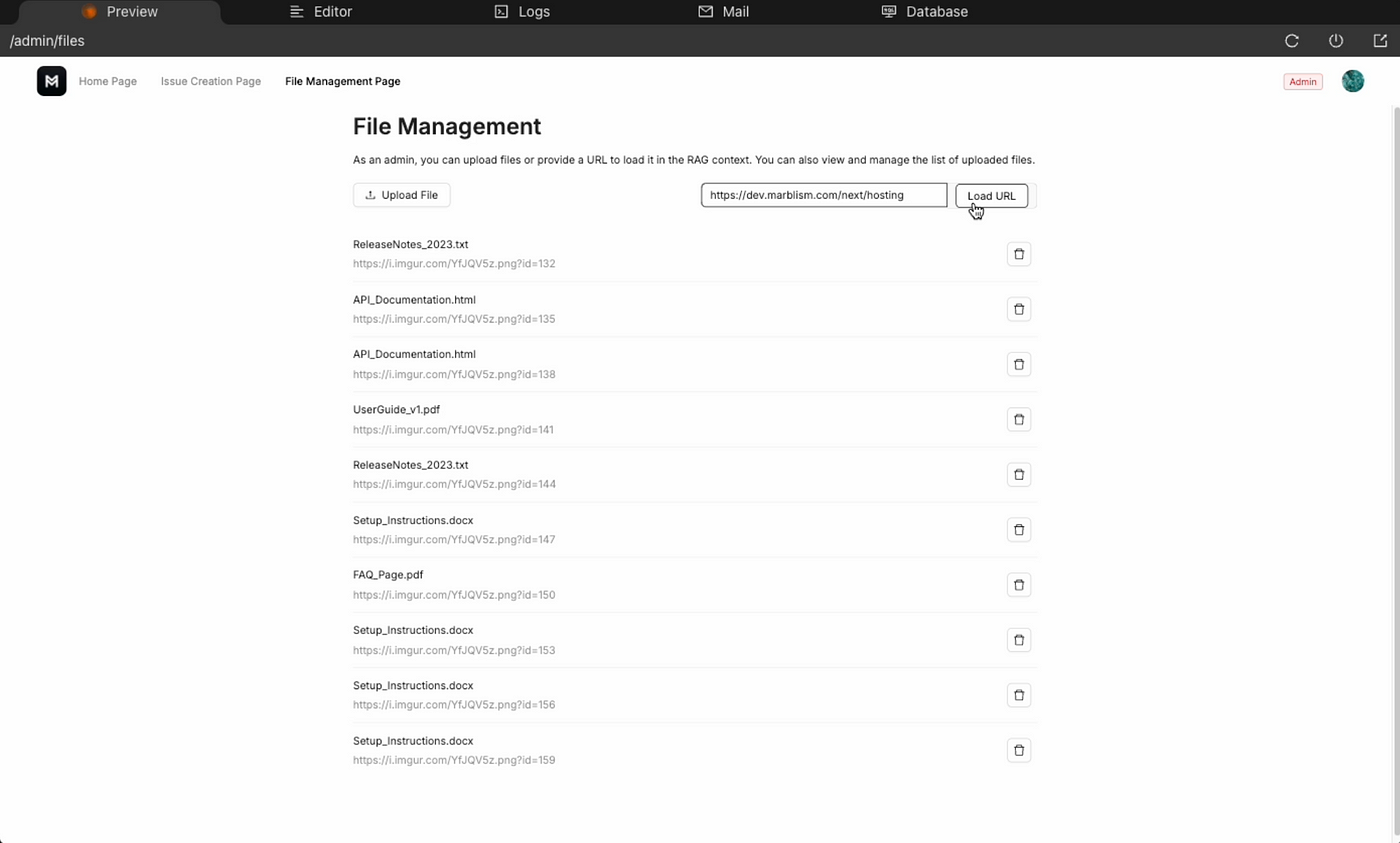
File Management Page
- As an admin, I can upload files or give an url that will be loaded it in the RAG context
- As an admin, I can view the list of uploaded files so that I can manage them.
Data Models
Next, the AI generates data models based on the pages and user stories. It’s important to review these models to verify they accurately represent the data structure needed for your application.
Some models such as the user and the RagVector model coming from the AI RAG module are protected because they are crucial to the app’s functionality.
 Project creation — Data Models
For example, I plan to remove the issue.initialMessage as I want issues to use the message model only.
 Project creation — Data Models changes
Done
With the generation process complete, we can now move on to the next phase.
 Project overview
Testing the project
With the project generated, it’s time to review and refine. We are going to use the Workspace (online development environment) to evaluate what the AI has produced. This is where we’ll complete any missing elements and fix any issues.
 Start Workspace
Workspace Overview
Here we are in the Workspace with the following functionalities
Chat
- Located on the left side, where we can ask the AI to update our project’s code.
Editor
- A browser-based VS Code, allowing us to review the AI’s changes or code manually in parallel.
- You can manually save changes in the “Source Control” tab like you would do locally.
Logs
- Enables us to debug and understand what’s happening on the server.
Database
- Provides access to view and update the app data.
- Sessions are initialised with the
prisma/seed/mockData.tswhere the AI created mock data.
 Workspace overview
Important
Developing your application requires some technical knowledge. While the AI performs well with business logic, it may struggle with precise design tasks. If you have basic coding skills, you can manage by following resources like Ant Design and Tailwind for design adjustments. However, if you have no technical background, you might find this challenging and may need some assistance.
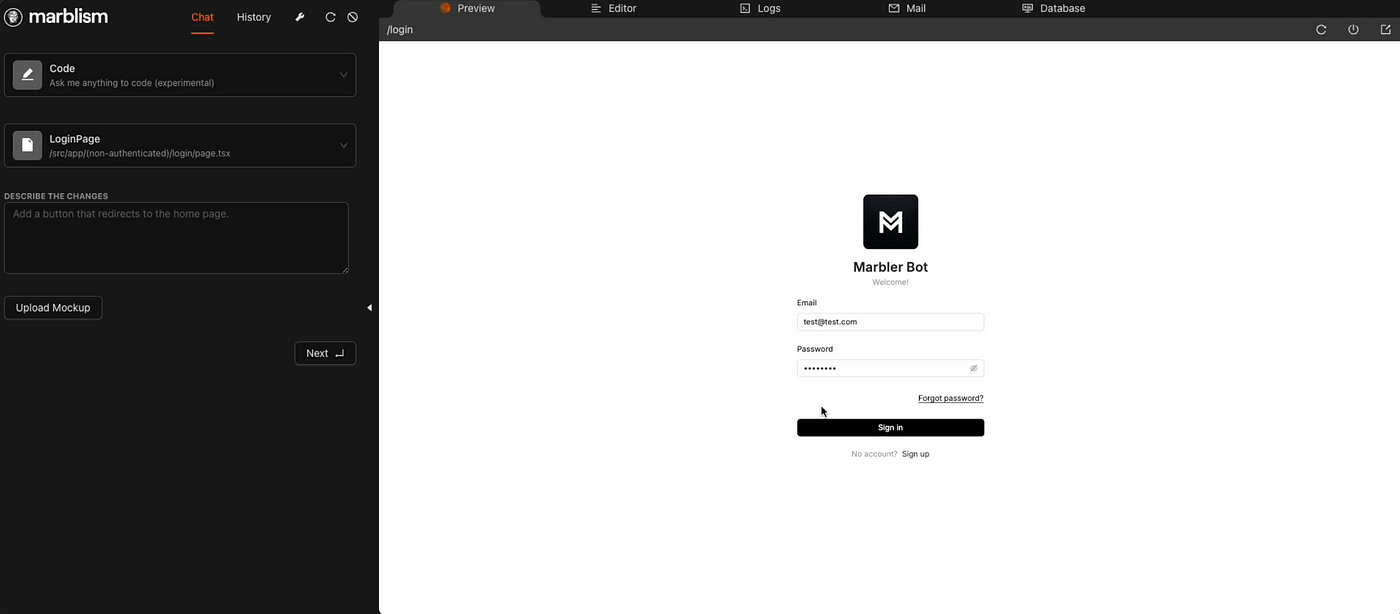
Authentication
The project includes a standard JWT authentication system using Next Auth. This module hasn’t been modified by the AI to avoid any errors. It covers most web application use cases, so there’s no need to change anything for this project, although you can manually update the code if necessary.
Authentication
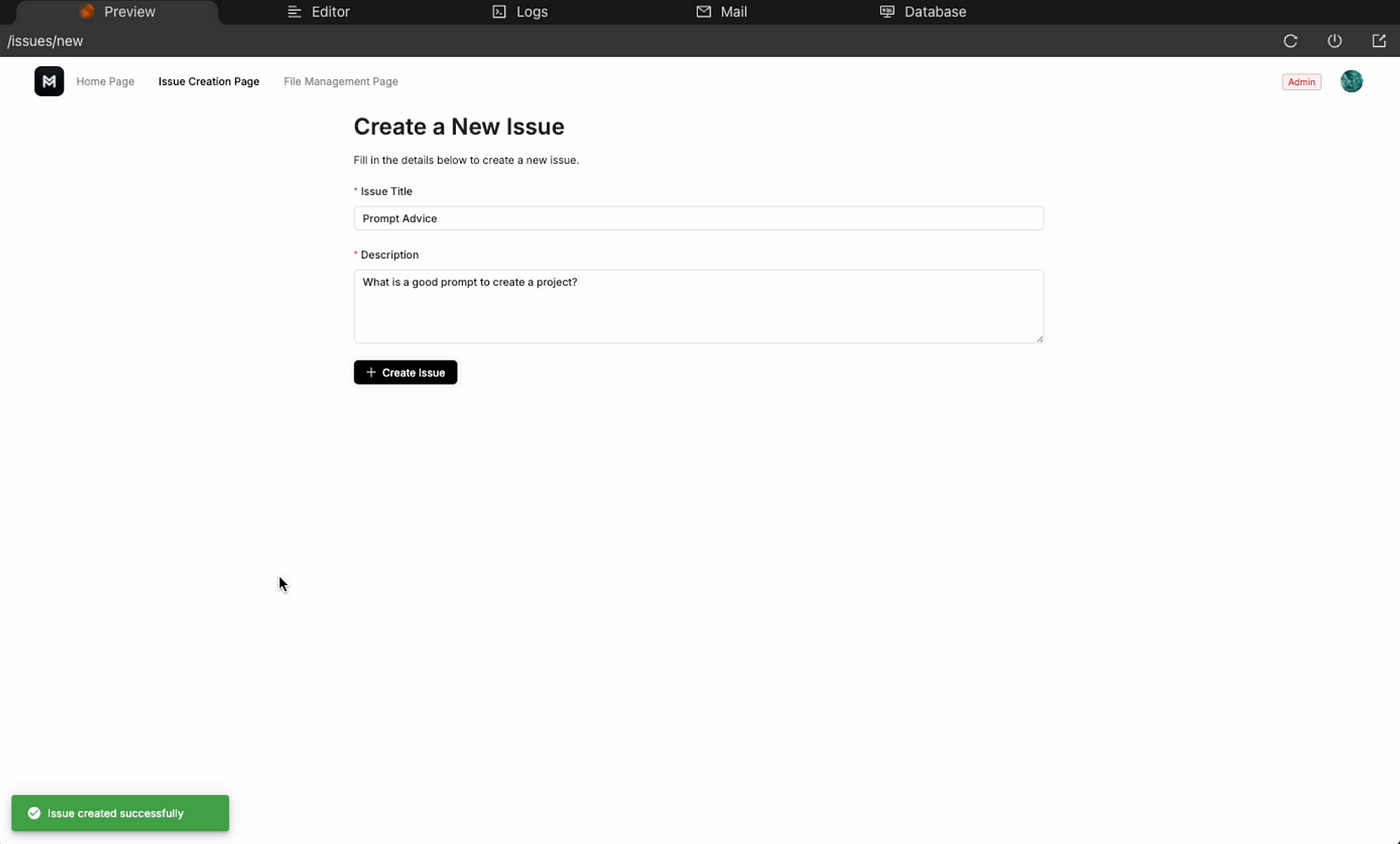
Issue Creation
I successfully created an issue with a title and initial message. I also confirmed in the database that a new message row is correctly linked to the created issue.
 Issue Creation
Issue View
Upon creation, I’m correctly redirected to the issue’s view.
- Relevant issue information is visible.
- The initial message appears in the messages section.
- I can close and delete the issue.
- I can edit and delete my messages.
- I can post new messages.
- The AI can generate messages.
 Issue View
 AI Response
Issue List
The home page displays a minimalist list of issues, and clicking on an issue correctly redirects me to its view.
 Issue List
RAG File Upload
I loaded the Marblism hosting documentation into the RAG context and now I can see that the AI is aware of it when I generate a response on the issue’s view.
 RAG File Upload
 AI Response with hosting documentation
 Hosting documentation retrieved
Observations
After testing the project for the first time, here are the updates we’ll make in the next section.
Issue Creation
- Replace the initial message with a dedicated issue description to use as the main topic for AI-generated responses.
Issue List
- Display additional information for each issue, such as creator, status, date, and the number of messages.
Issue View
- Include the history of messages to create a real conversation with the AI.
- Enhance the UI design (it’s definitely not looking good for now).
Developing the project
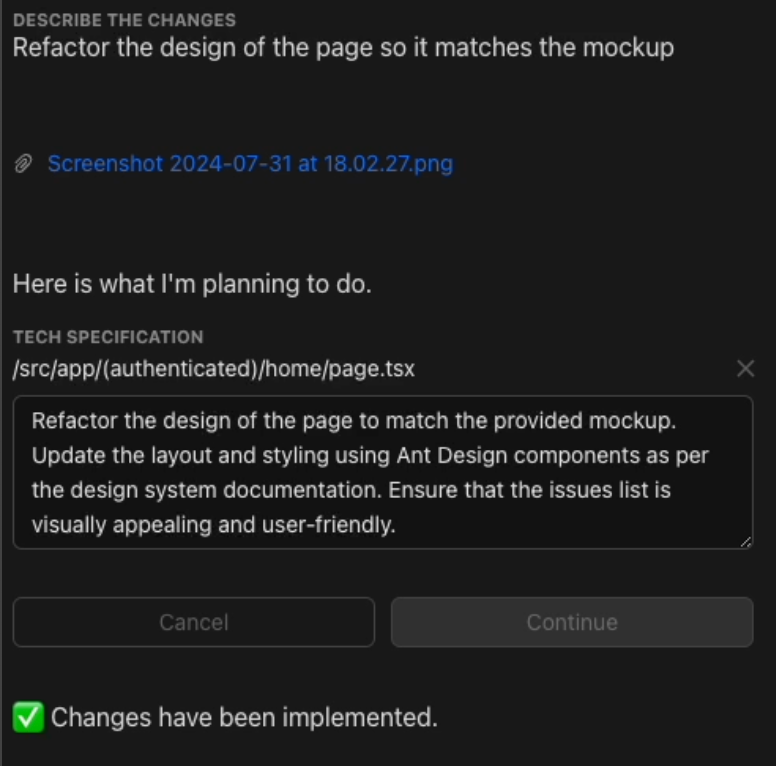
Issue Creation #1
Replace the initial message with a dedicated issue description to use as the main topic for AI-generated responses.
This change mostly involves business logic, let’s use the Chat to handle it.
 Chat Interaction
The AI correctly identified that a new field is needed in the issuemodel. Since we use Zenstack to auto-generate our server CRUD functions and Prisma to sync our database, we need to run some commands to synchronize everything.
The easiest way is to restart the app using the top bar options.
Alternatively, you can run the commands manually in the editor’s integrated terminal
- Run Zenstack
pnpm run crud:sync - Run Prisma
pnpm run database:sync - Run both
pnpm run global:sync
All commands are listed in the
package.json
 Restarting App to apply model changes
Now the creation of issue works with the new field description .
 Issue creation with description
I also instructed the AI to display the new field on the Issue’s page.
 Chat Interaction 4.1.2
 Issue View with the description
In parallel, I used the editor to ensure the description is included in the AI prompt (Line 93).
 Issue View code
As you might have noticed, there are some TypeScript issues on my page. Most of the time, it’s because the TypeScript server isn’t up to date with the auto-generated routers from Zenstack.
I restart the TypeScript server to resolve these issues.
 CMD + Shit + P → Typescript: Restart TS Server
Now I can generate the first AI response directly from the description.
 Testing AI response with issue description
Issue List #1
Display additional information for each issue, such as creator, status, date, and the number of messages.
I’m using the Chat with a mockup I found on Dribbble to display a list of cards.
 Chat Interaction
 Home page refacto
Next, I make several specific changes via the chat
- Add a title “Hello [user name]”
- Add a button “New Topic”
- Display a tag “[open | closed]” on each card
- Show the issue’s creator and the date of creation on each card
- Display a counter on each card representing the number of messages in the issue
Small, precise chat requests are more effective than a single large request with multiple changes.
 Home page final version
Issue View #1
Include the history of messages to create a real conversation with the AI.
I noticed that when continuing an issue conversation, the AI only analyzes the latest message. I’m using the chat to request the inclusion of previous messages in the analysis.
 Chat Interaction
I also loaded additional documentation to ensure the AI can retrieve information from multiple sources. Now, I can have a proper conversation.
 Issue conversation
Issue View #2
Enhance the UI design (it’s definitely not looking good for now).
Most of the changes involve alignment and spacing. This time, I primarily used the editor, as I found it quicker and less effort-intensive than explaining the exact details to the AI.
 Issue View final version
Now that the UI is better, I go back on the chat to add more features.
- Enable issue creators and admins to update issues.
 Chat Interaction
 Edit issue modal
Permissions
The final step is to ensure the API is properly secured.
Zenstack simplifies this by allowing model-level policies using the @@allow decorator. The @auth() function represents the request’s user, and this refers to the current model. I can define rules to control CRUD permissions, which also influence how find and findMany tRPC functions filter data.
Issue
For example, I secured the issuemodel
// Allow all actions if the user's ID matches the issue's userId
@@allow("all", auth().id == this.userId)

// Allow all actions for users with the admin role
@@allow("all", auth().roles?[name == 'admin'])

// Permit everyone to read an issue
@@allow("read", true)
 /models/issue.zmodel
Deploying the project
Back on Marblism app hosting tab.
- I update the subdomain to
marbler-bot.app.io. - I add my personal OpenAI API key to the environment variables and deploy.
 Subdomain
 Environment Variables
 Deploy in progress
 Deploy success
Marbler Bot is now live at https://marbler-bot.app.io.
Users can post issues similar to GitHub and receive quick AI-generated responses.
I hope this guide helps you leverage Marblism to launch your ideas quickly.
Et voilà, à bientôt.
Get in Touch
Feel free to reach out if you need a similar guide for another type of app.